How to Span One Video Across Two Screens with FloSync
Turn two side-by-side screens into one wide picture. A step-by-step guide from plugging in your displays to going live.
Contents
FloSync is a free app for Mac and Windows that plays video across multiple screens. This guide covers the simplest case: one computer, two screens, one video running across both as a single continuous picture.
What you'll build: one video playing across two screens as a single picture.
We'll demonstrate with this Chicago L train clip from Envato.
By the end, you will have that setup live on your screens: one computer driving two displays, no network and no specialized video-wall controller required.
What you need
- A computer that can drive two displays at once, either with built-in outputs or a suitable dock or adapter (port count alone doesn't guarantee this, so check your machine's specs if unsure)
- Two landscape screens, physically placed side by side
- FloSync, free to download and use (Getting Started covers installing it)
- A video file to play across your screens; its shape doesn't need to match your screens exactly
This walkthrough's screenshots use two matching 1080p screens, a choice for this guide, not a FloSync requirement: any screen sizes work. For more than two screens, see How Many Screens Can One Computer Drive?.
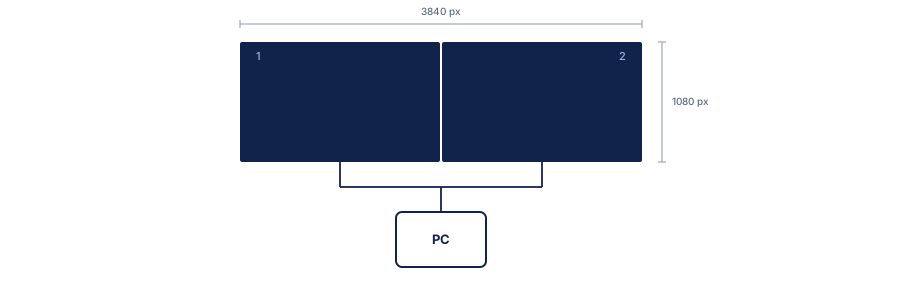 One computer drives both screens directly, no network involved. In Spanned mode, one picture spans both: the left half on screen 1, the right half on screen 2.
Step 1: Extend your desktop across both screens
Plug in both screens and set your operating system to Extend the desktop, not duplicate it.
Arrange them left and right in your display settings to match how they physically sit. On macOS, that's System Settings > Displays > Arrange. On Windows, right-click the desktop, choose Display settings, and drag the two screen tiles into the same order. FloSync reads this arrangement directly, so getting it right here saves you a step later.
Step 2: Open FloSync and confirm your screens
Install and open FloSync, then check that the composer, FloSync's main window, shows two screen boxes matching your arrangement.
FloSync detects your screens automatically: you'll see two boxes in the arrangement area, side by side in the same order you just set. If you only see one, or they're in the wrong order, check your operating system's display settings before continuing.
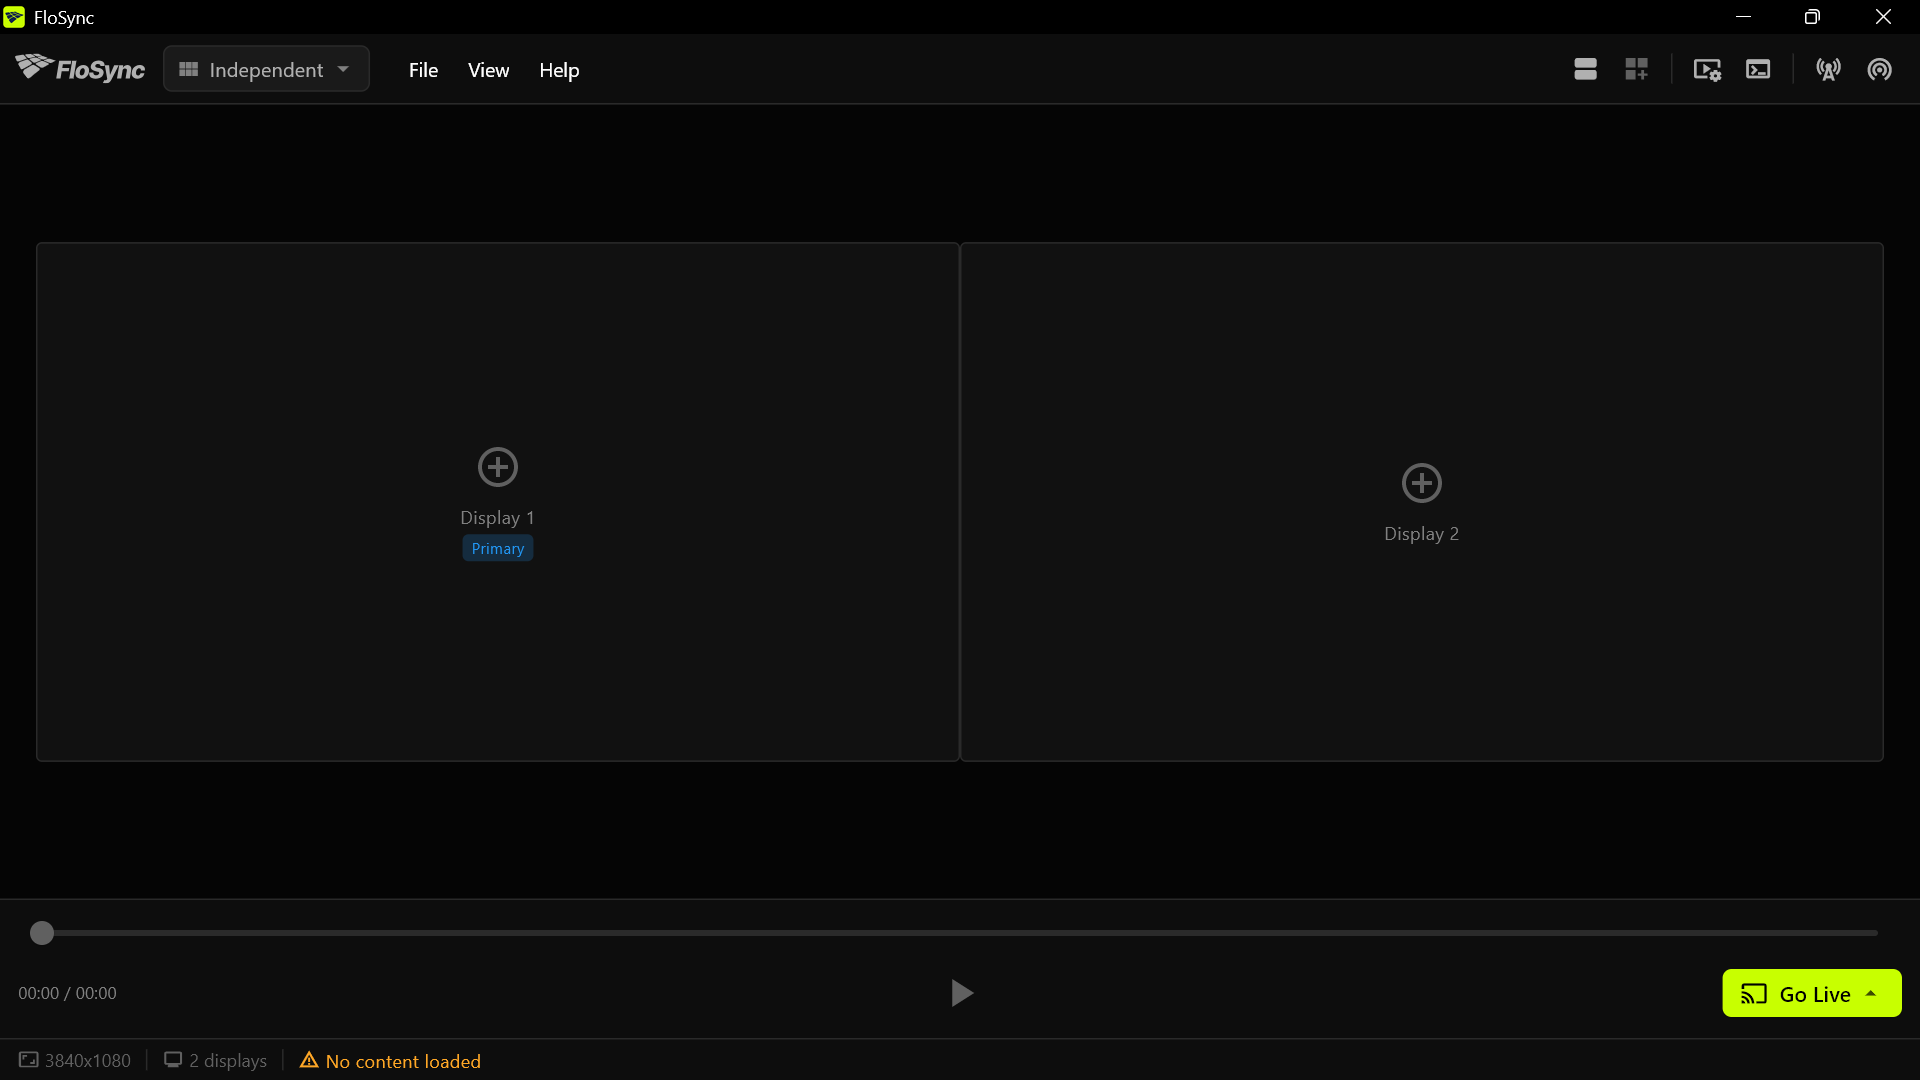 Two empty screen boxes, side by side, matching your displays: nothing loaded onto them yet.
Step 3: Add your video
Drag your video onto the box marked Primary, or click that box, choose Video / Image under Add Content, and browse for the file.
Drop the file there and FloSync loads it onto that screen only. The other screen box stays empty for now: on a fresh installation, FloSync starts in Independent mode, where each screen holds its own content. The next step, switching to Spanned, pulls this video across and splits it over both screens.
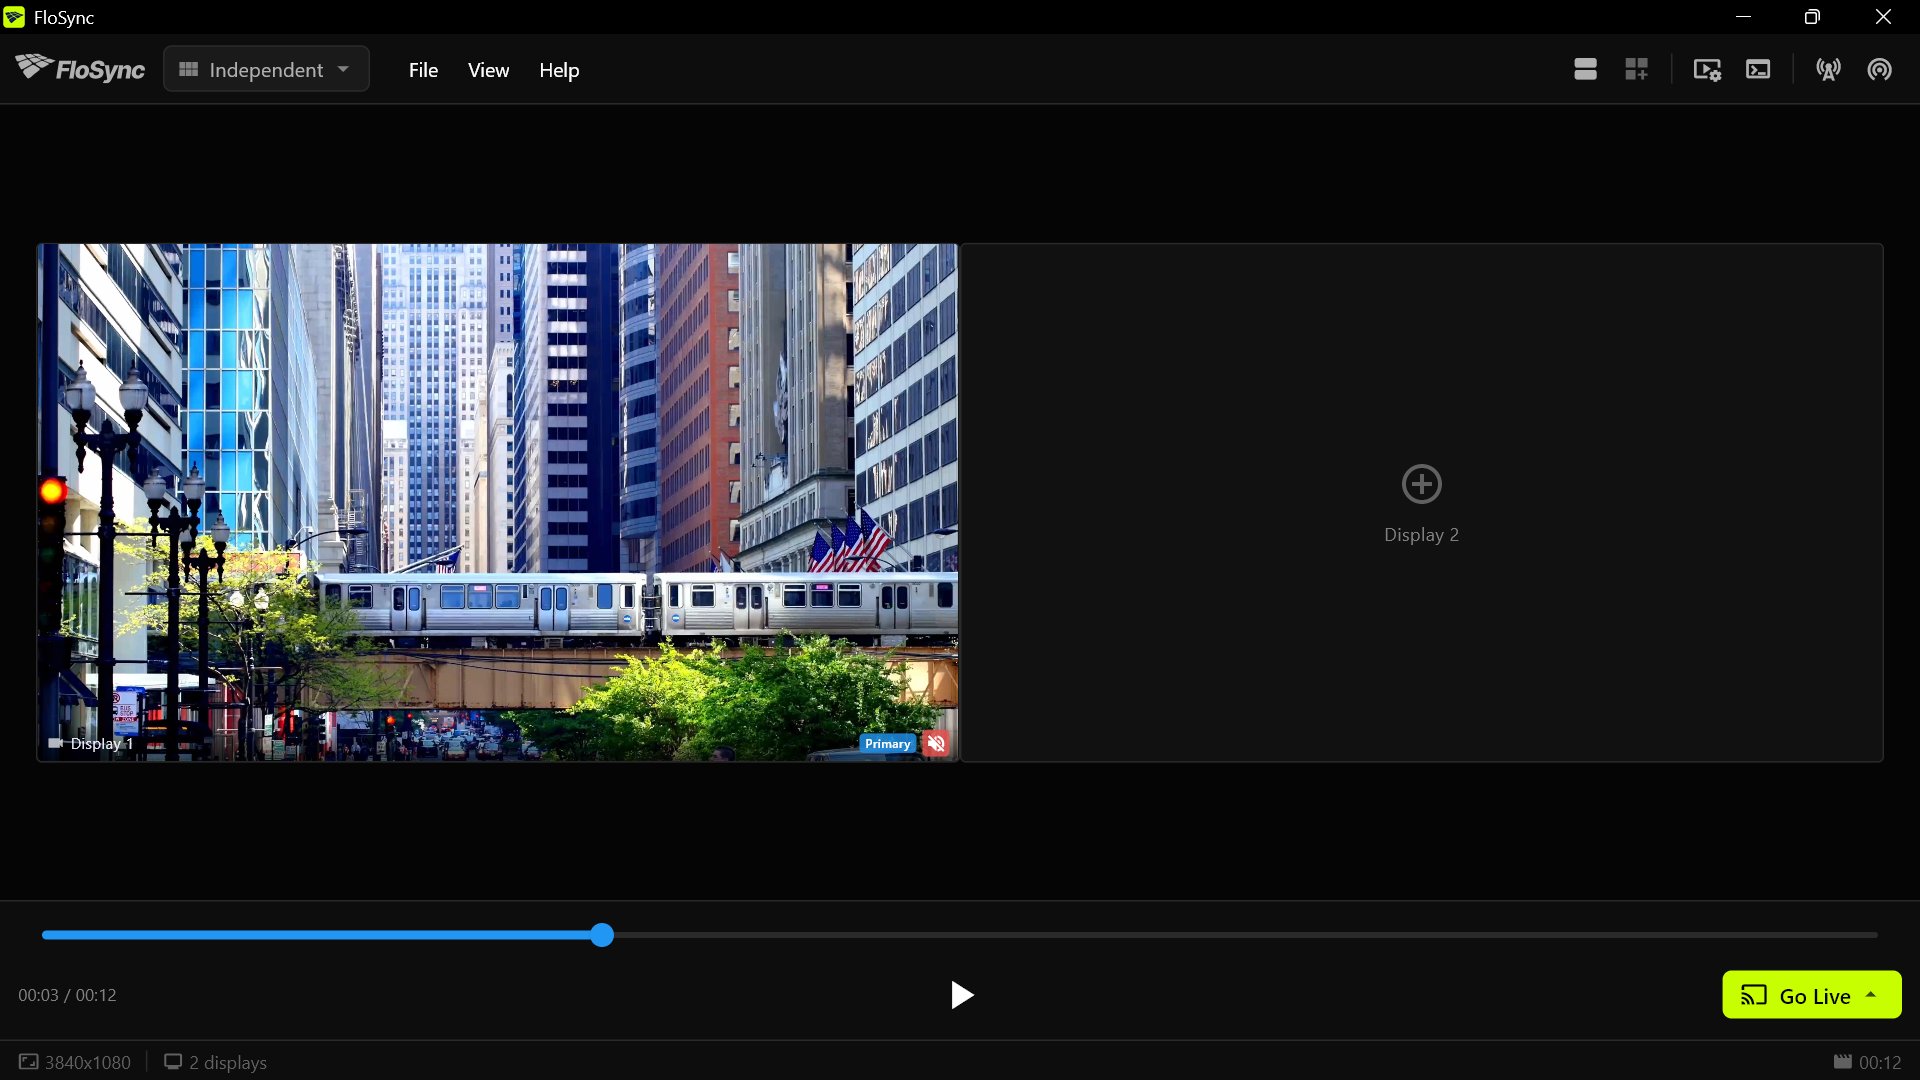 The video loads onto the Primary box, Display 1; Display 2 stays empty until the next step.
Step 4: Switch to Spanned mode
Open the mode dropdown in the top bar and select Spanned.
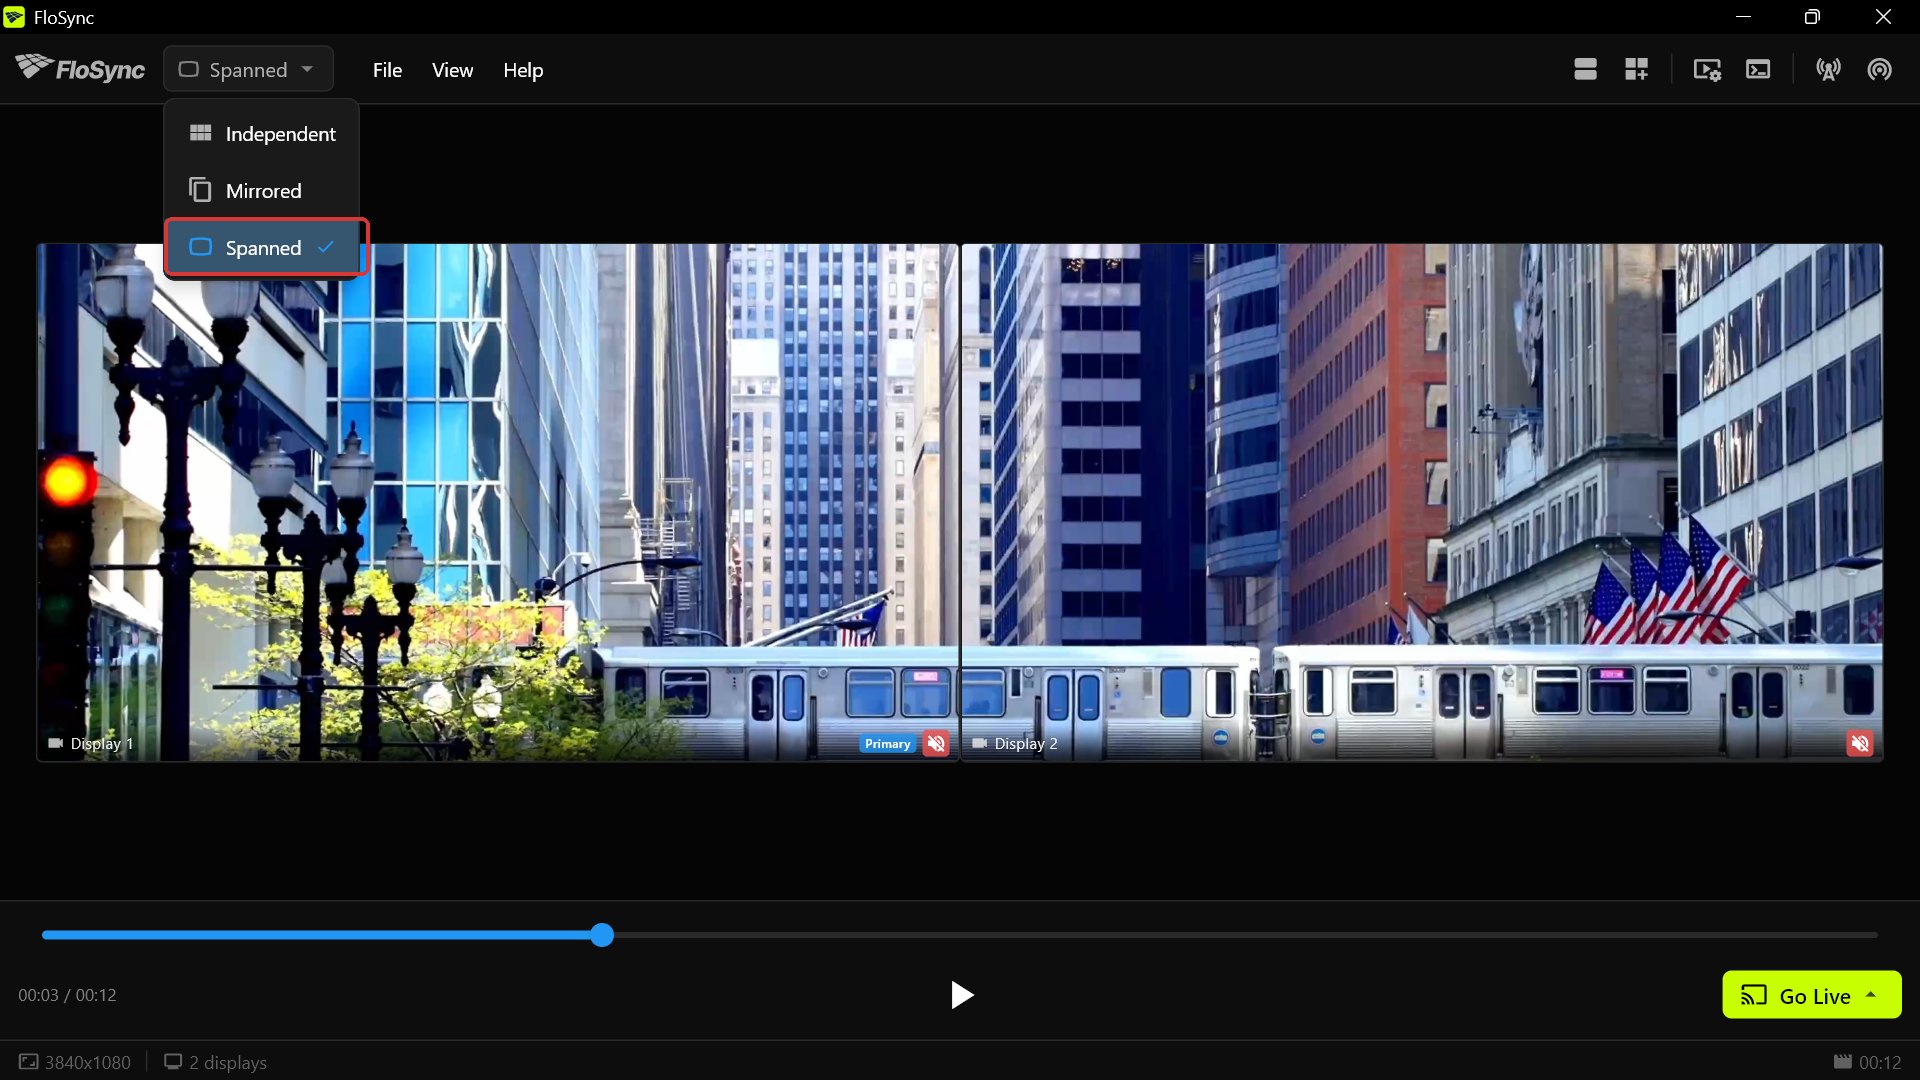 In Spanned mode, the same clip splits across both screens, the train crossing from one screen to the other. The dropdown above shows how you get there: open the mode menu and choose Spanned.
Spanned treats your two screens as one wide canvas, spreading a single picture across both, exactly what you want for a continuous scene. (The full comparison of all three modes lives in Display Modes, if you want the complete picture.)
If your screens look like the shot below instead, the same frame repeated on both, you're still in Mirrored mode. Open the mode dropdown and pick Spanned to fix it.
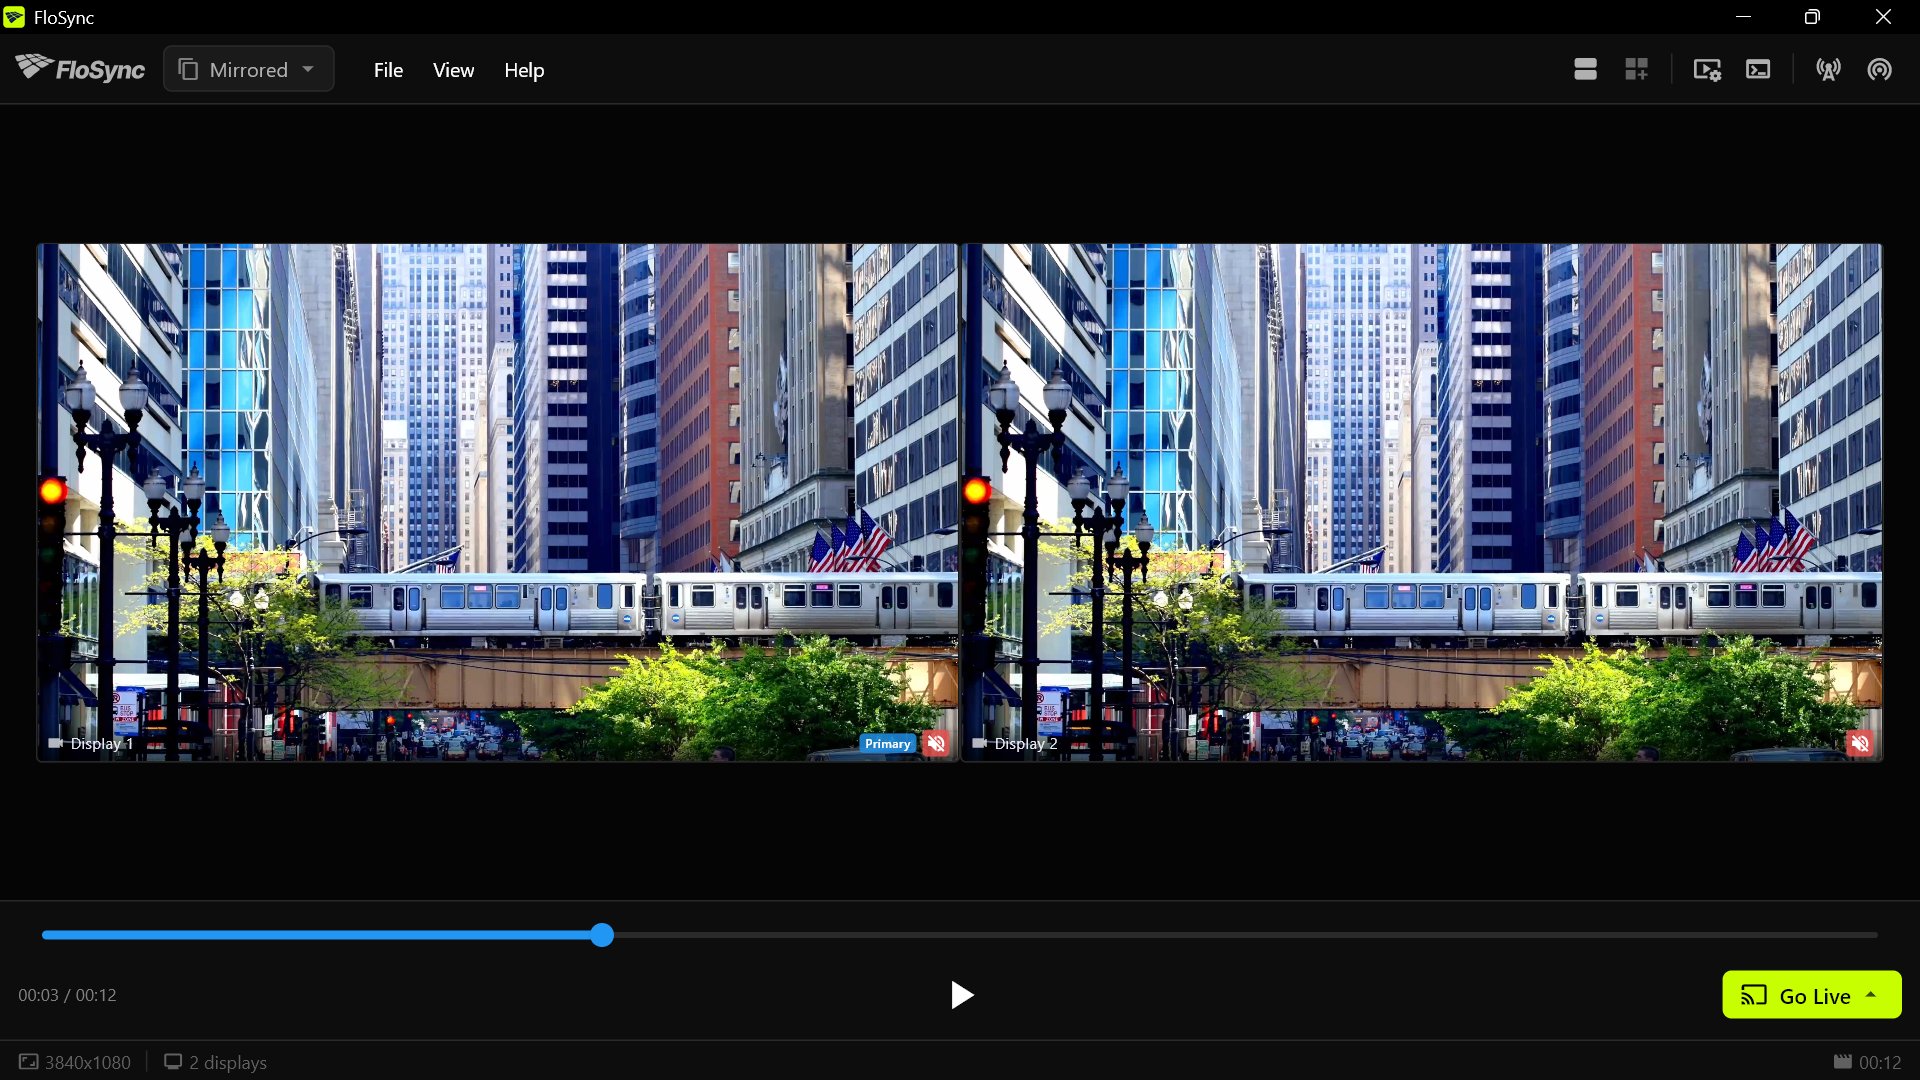 Screens like this mean you're in Mirrored mode, not Spanned.
Step 5: Fix the crop with Global Canvas Extension
After switching to Spanned, you may notice the train is partly cut off at the bottom. That happens because the video is taller than your two screens together, and FloSync fills the width while trimming the extra height.
If the picture is cropped, open Global Canvas Extension (the grid icon in the toolbar), set Top to one screen's height (1080 for the 1080p screens in this walkthrough), and click Apply; if your video already fits, skip this step.
The Global Canvas Extension button, in the top toolbar.
Global Canvas Extension adds virtual screen space around your real screens, so the part of the picture that would otherwise be cropped has somewhere to go. (The +T button under the 1080p row in Quick Adjustments sets the same value without typing it.) This adds a phantom row of virtual screen space above your two real screens, one 1080p display tall. If your screens match but run at a different resolution, use that height instead of 1080.
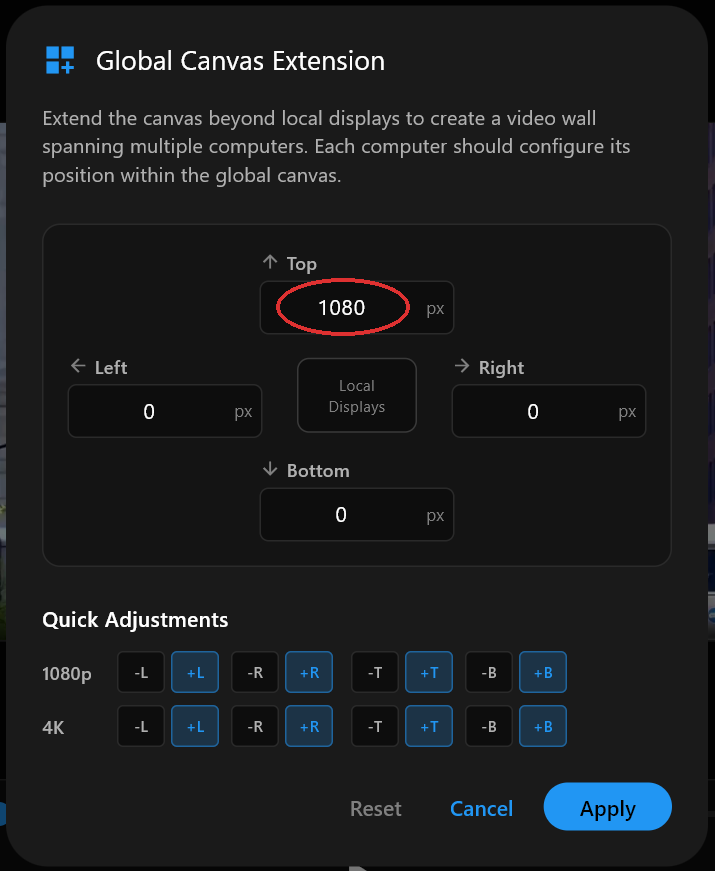 The Global Canvas Extension dialog, with Top set to 1080.
After you click Apply, FloSync opens the global-canvas preview automatically: your global canvas is now 3840x2160, the exact shape of the video, with your two real screens occupying its lower half. (The zoom icon toggles between this global view and the local one.) The upper band stays virtual, invisible on any screen; once you go live, your two physical screens will show the lower band where the train runs.
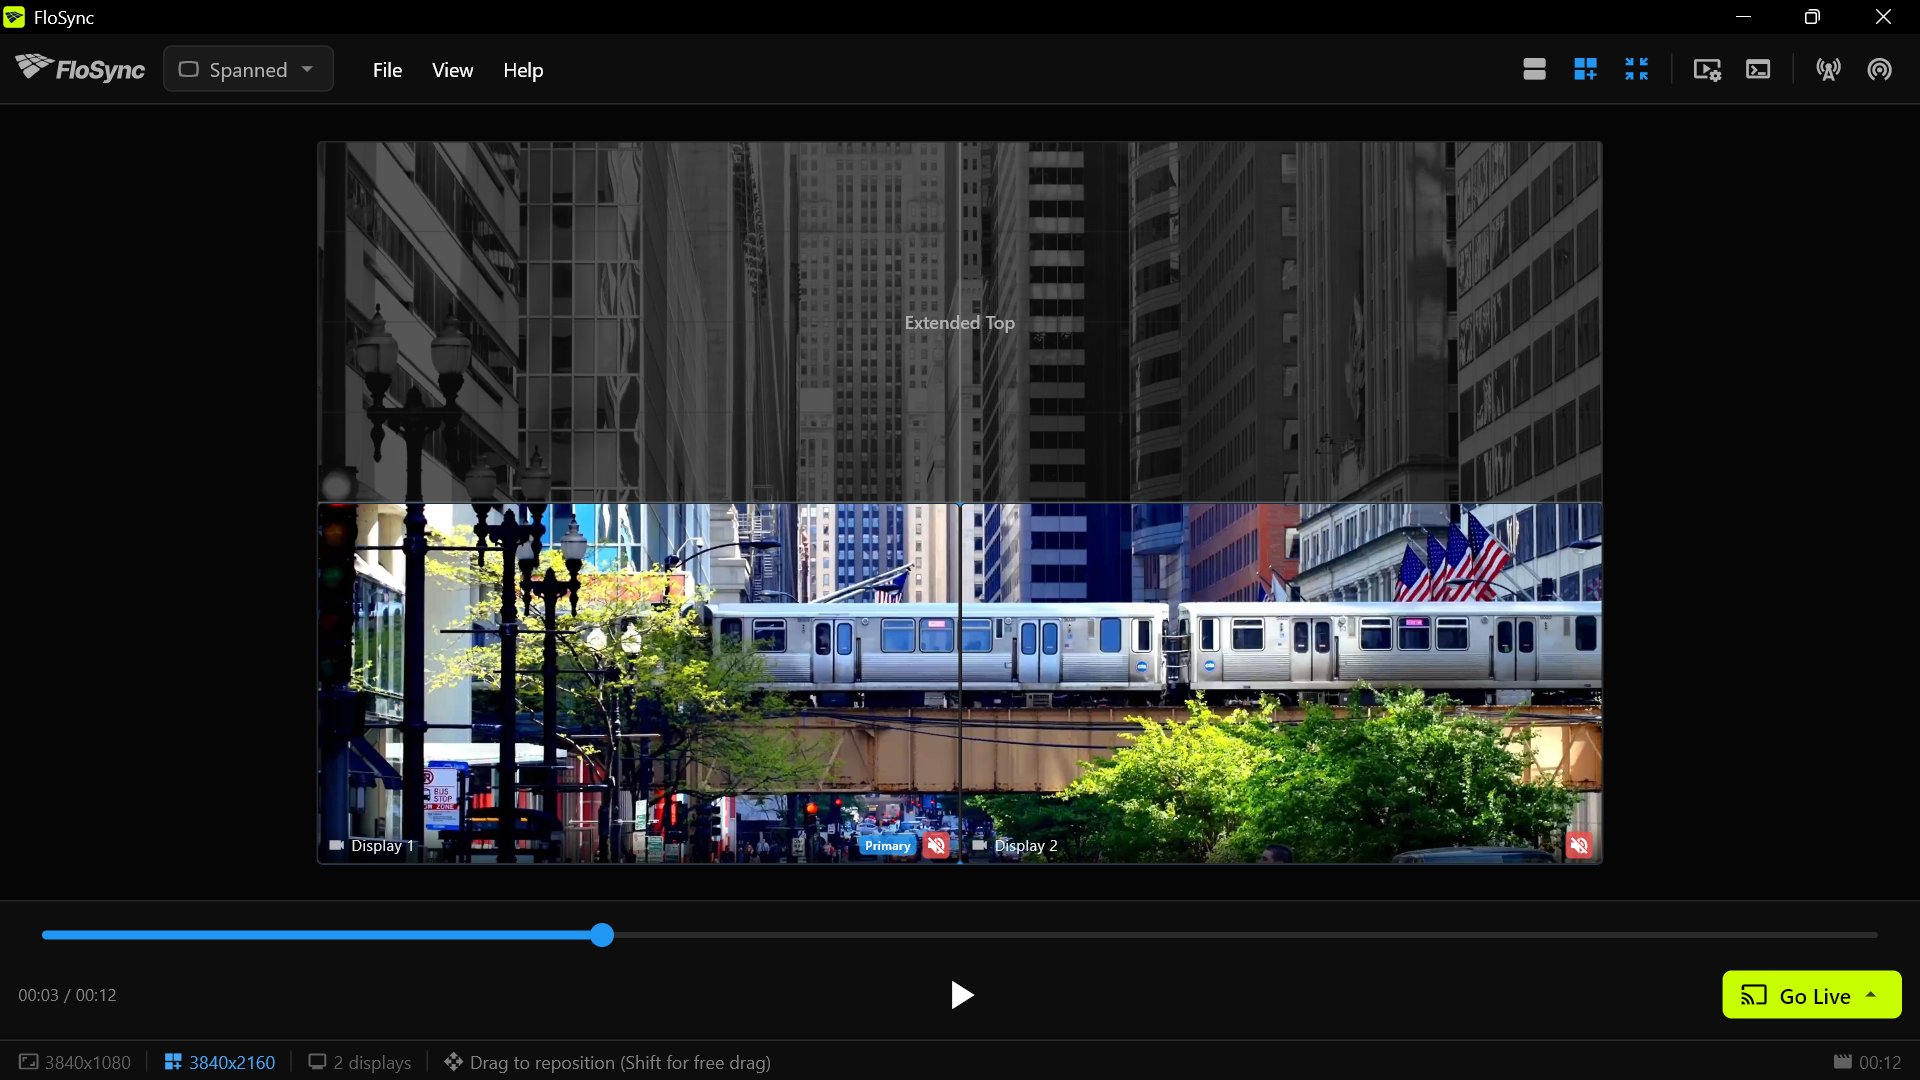 After the extension, a phantom row sits above the two real screens, and the full frame now fits the taller canvas.
The same trick works in any direction: extend Top to bring the bottom of the picture into view, Bottom to bring the top into view, Left to bring the right-hand side into view, or Right to bring the left-hand side into view.
Step 6: Preview and scrub
Drag the timeline slider in the composer and watch how motion crosses from one screen box to the other.
This is the moment to catch anything off before you go live. Scrub to where the train passes between the two screens; the motion should read as one continuous picture.
Step 7: Go Live
Click Go Live in the playback controls, then choose Go Live (Current) to send your video fullscreen to both displays.
The Go Live button, at the bottom right of the composer window.
FloSync opens a fullscreen window on each screen, and the composer's controls step out of the way. This is the real test. What you saw in the preview boxes is now the picture on your actual screens.
Step 8: Step back and watch
Stand back where a viewer would stand and watch a few passes.
When you're done, press ESC, or click anywhere on either fullscreen window, to exit and go back to the composer.
Where this leads
This setup is small, but it proves the same idea behind every larger spanned wall FloSync runs: one picture, split cleanly across however many screens you give it. Bigger walls add their own hardware, networking, and configuration decisions, which the rest of this series covers, but the core idea you just used doesn't change.
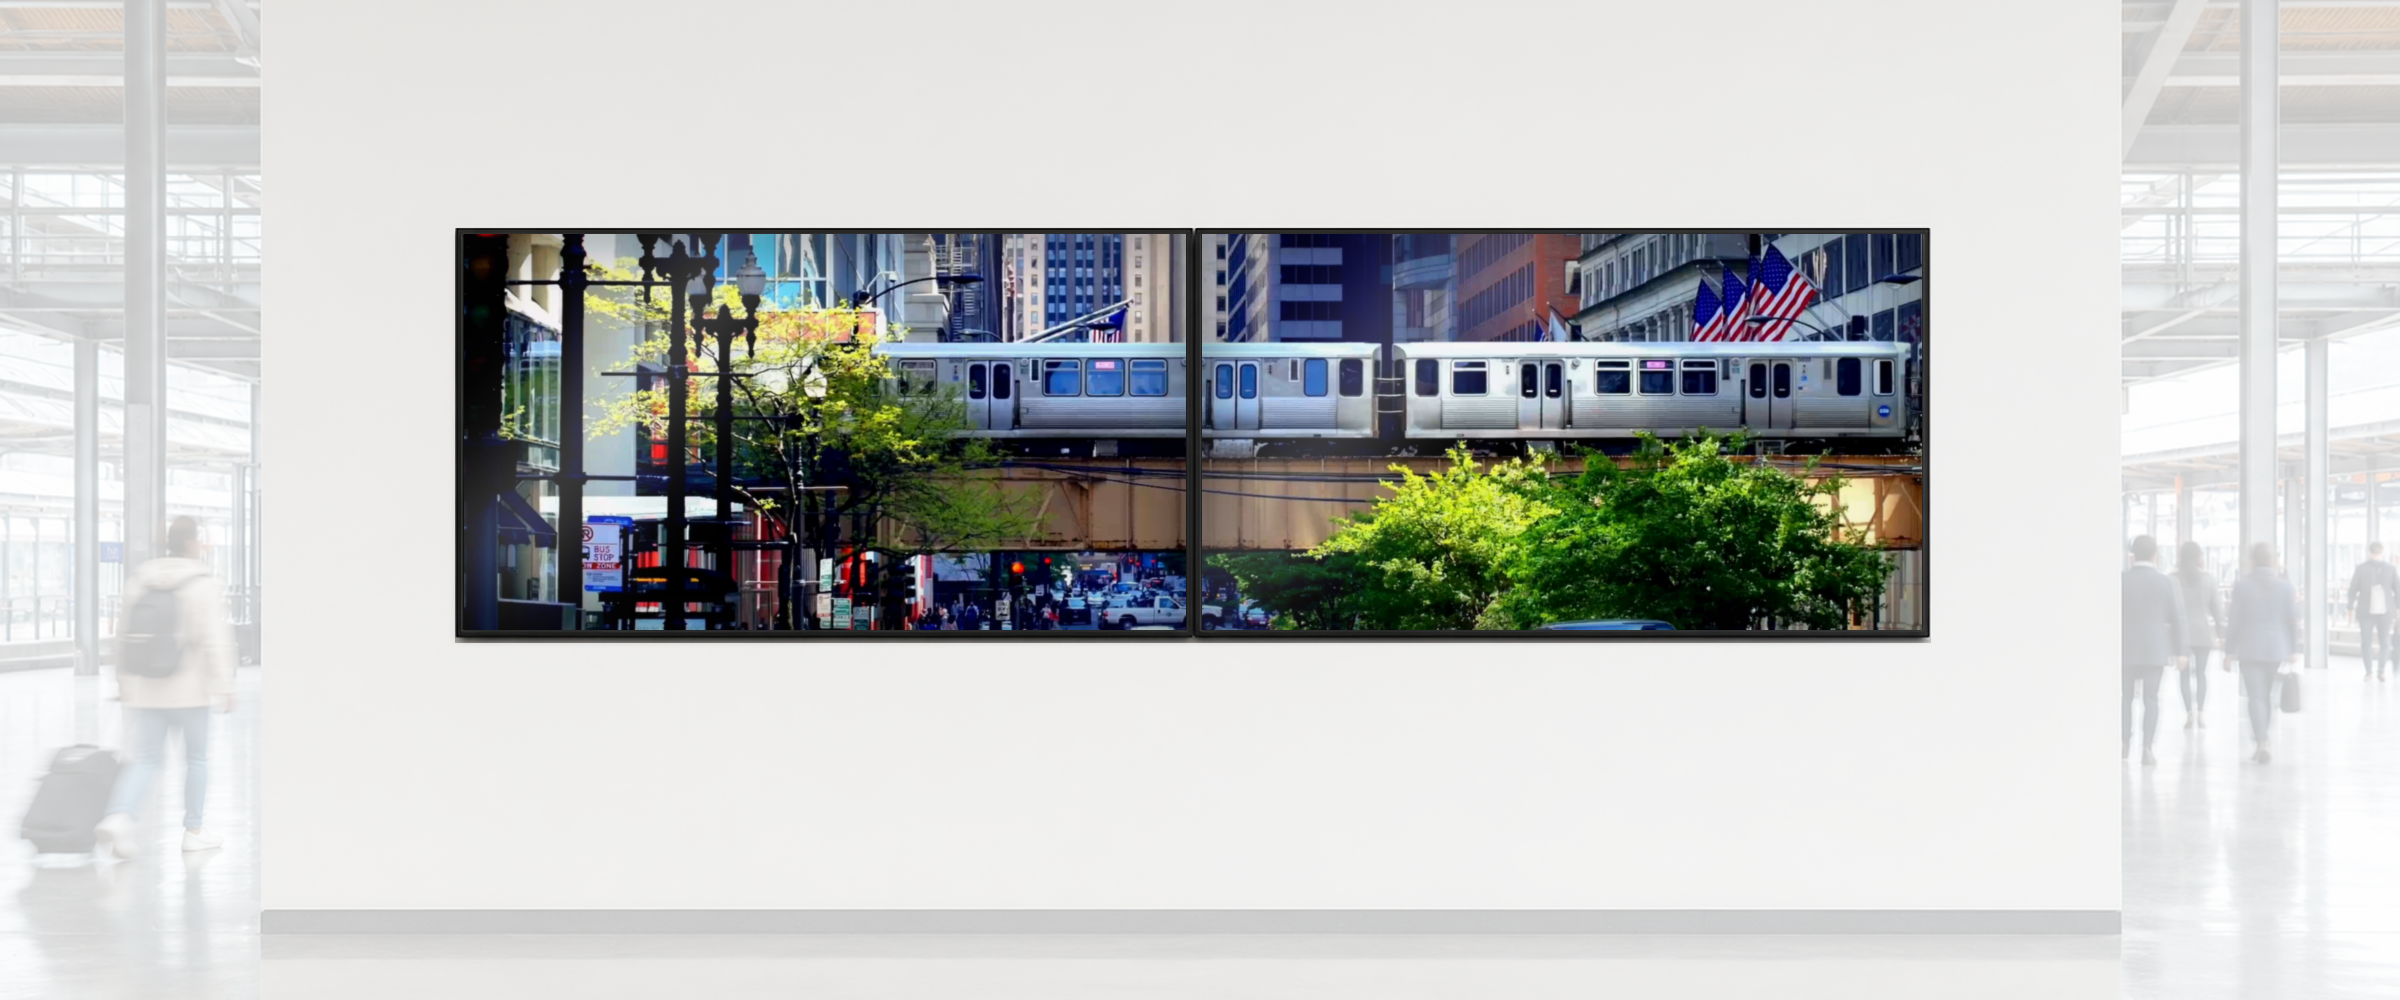 The same two-screen setup in a station concourse.
If you're building something that runs unattended, day after day, launching FloSync at login and going live automatically on startup is worth setting up next, in Preferences.
This is the first and simplest guide in a short how-to series on using FloSync. Check back soon for the rest of the series.
Frequently asked questions
My video looks stretched or cropped after I set it up. Which fit mode should I use?
FloSync starts with Fill: it fills both screens completely, trimming whatever doesn't fit. If you want something different, open your video's settings: Fit shows the whole frame but can add black bars, and Stretch fills the screens exactly but distorts the picture, a poor fit for a continuous scene like this one.
Why does my video look duplicated on both screens instead of split?
That is Mirrored mode. Mirrored repeats the whole picture on every screen; Spanned splits one picture across them. Switch the mode dropdown to Spanned.
Does my video need to be a specific size or shape for two screens?
No. Any common video works: FloSync's Fit or Fill setting handles most shape mismatches automatically, and Global Canvas Extension in Step 5 reframes the rest by adding virtual space around your screens.
The important part of my video gets cut off at the top or bottom. Can I fix that?
Yes. This happens when your video's shape doesn't match your screens' combined shape, so Fill crops out whatever doesn't fit. Open Global Canvas Extension (the grid icon) and add virtual space on the side opposite the part you're missing: extend Top to bring the lower part of the video into view, Bottom for the upper part, Left for the right-hand part, or Right for the left-hand part. Step 5 above walks through the Top example.
About the author
Daniel Palka
Creator of FloSync
Daniel has been building multi-screen video software since 2007, when FloSync began as a student project called ArraySync.
Our StoryRelated articles
-
How Many Screens Can One Computer Drive?
FloSync sets no screen limit. Your ceiling is your computer's display outputs and the video you play. A ten-minute test finds your own number.
-
Free Video Wall Software: How to Sync Video Across Multiple Screens
Free video wall software that keeps every screen in sync. Why displays drift apart over time, and how to lock them together across one computer or many.
-
Video Wall Software for Trade Shows and Live Events
What to look for in video wall software when you are setting up in an unfamiliar venue with limited time: sync, setup speed, scheduling and hardware.