How to Build a Three-Screen Restaurant Menu That Changes by Time of Day
Build a menu board that switches itself from breakfast to lunch to dinner, on three screens and one computer, with the free Harvest Table templates.
- Digital signage
- Scheduling
- Hospitality
- Multi-screen
Contents
- What you need
- Step 1: Connect and arrange your three screens
- Step 2: Install and open FloSync
- Step 3: Keep Independent mode selected
- Step 4: Download the Harvest Table templates
- Step 5: Load the breakfast menu
- Step 6: Open the schedule panel
- Step 7: Add two scenes
- Step 8: Name the scenes Breakfast, Lunch and Dinner
- Step 9: Set your changeover times
- Step 10: Load the lunch and dinner menus
- Step 11: Preview the menus and test a changeover
- Step 12: Go Live for the day
- Step 13: Start the menu board automatically
- Wrapping up
FloSync is a free app for Mac and Windows that runs digital signage across multiple screens. This guide uses one computer and the free Harvest Table templates to build a three-screen menu board. FloSync changes the board from breakfast to lunch to dinner on your schedule, so breakfast is never still showing at 2pm.
The example changes over at 11am and 5pm. You set your own hours in the same place.
What you'll build.
What you need
Time: about 20 minutes
- A Windows or macOS computer that can drive three displays at once (three ports alone don't guarantee it, so check your graphics hardware if unsure)
- Three landscape screens, placed side by side
- FloSync, free to download for Mac and Windows
- The free Harvest Table menu templates
Step 1: Connect and arrange your three screens
Plug all three screens into the computer and set your operating system to extend the desktop across them, not mirror it.
In your display settings, arrange the three screens in the same left-to-right order they sit in behind the counter, so what you see on your computer matches what a customer sees.
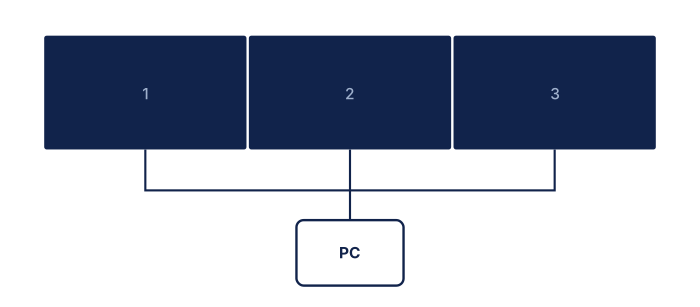 One computer, three screens in a row.
Step 2: Install and open FloSync
Download and install FloSync, then open it.
The composer, FloSync's main window, shows three screen boxes in the order you just set. If one is missing or out of place, fix it in your display settings before going on.
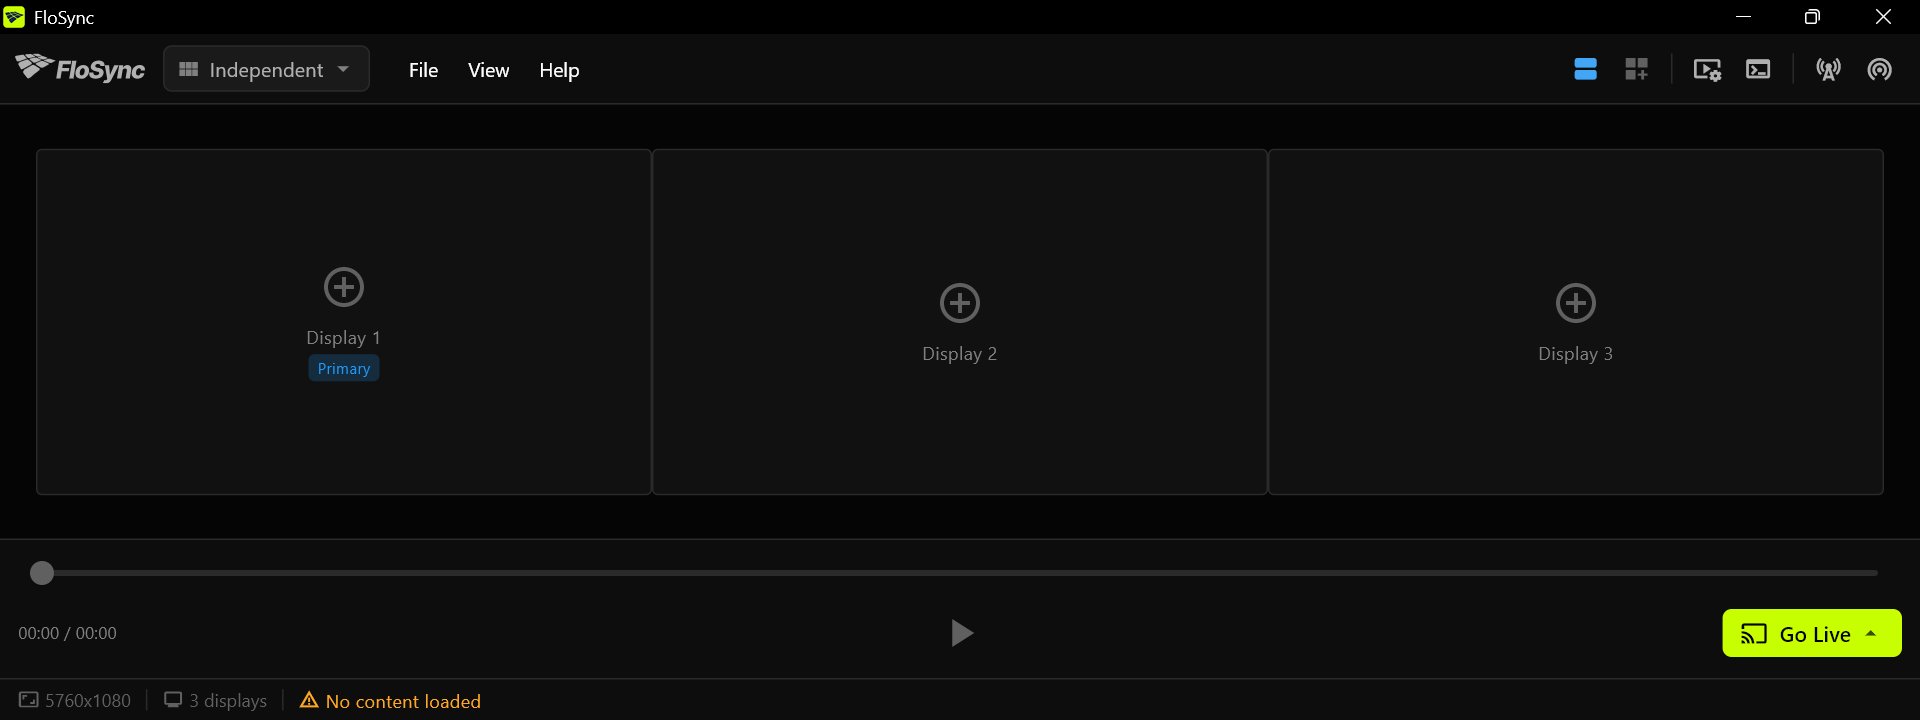 The boxes should be in the same order as your screens.
Step 3: Keep Independent mode selected
Leave the mode dropdown set to Independent.
The mode selector, at the left of the toolbar.
Independent mode gives each screen its own content. Here that means one menu panel per screen, and the three panels read together as one board.
Step 4: Download the Harvest Table templates
Download the free Harvest Table template set, unzip it, and keep the folder somewhere permanent, since FloSync loads the pages from wherever you leave them.
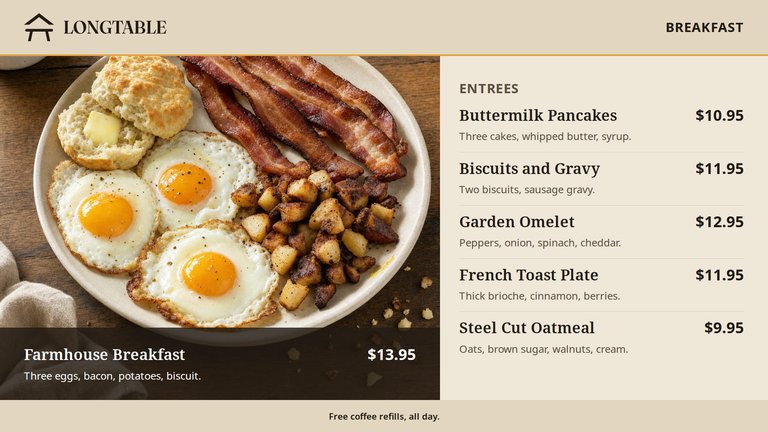
Harvest Table
A restaurant menu board for three landscape screens, with breakfast, lunch and dinner menus.
Free for Canva, PowerPoint, Illustrator, and HTML.
Download Free TemplateGet the HTML version from the Harvest Table template page and unzip it (your Documents folder is fine). Inside the harvest-table-en-landscape-html folder are a breakfast, a lunch and a dinner folder, each holding that menu's three pages with their photographs and fonts, plus a README and the license. Keep each folder together so the pages keep their artwork. The folder and file names are the same in every language. The README inside is in your language and explains them.
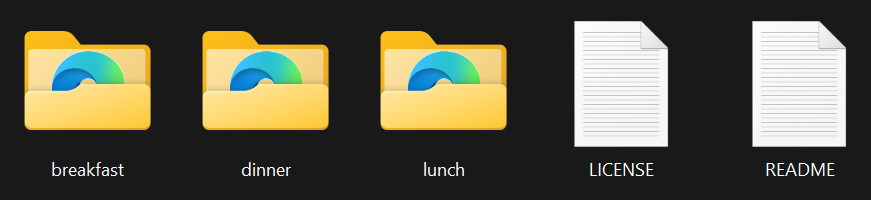 The unzipped template folder.
Step 5: Load the breakfast menu
Right-click each screen box in the composer, choose Load HTML File..., and load left-entrees.html on the left screen, middle-specials.html in the middle and right-sides-drinks.html on the right.
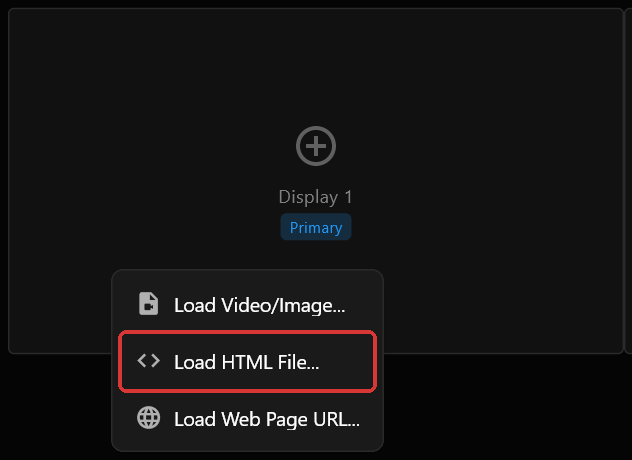 The right-click menu on a screen box.
All three pages are in the breakfast folder.
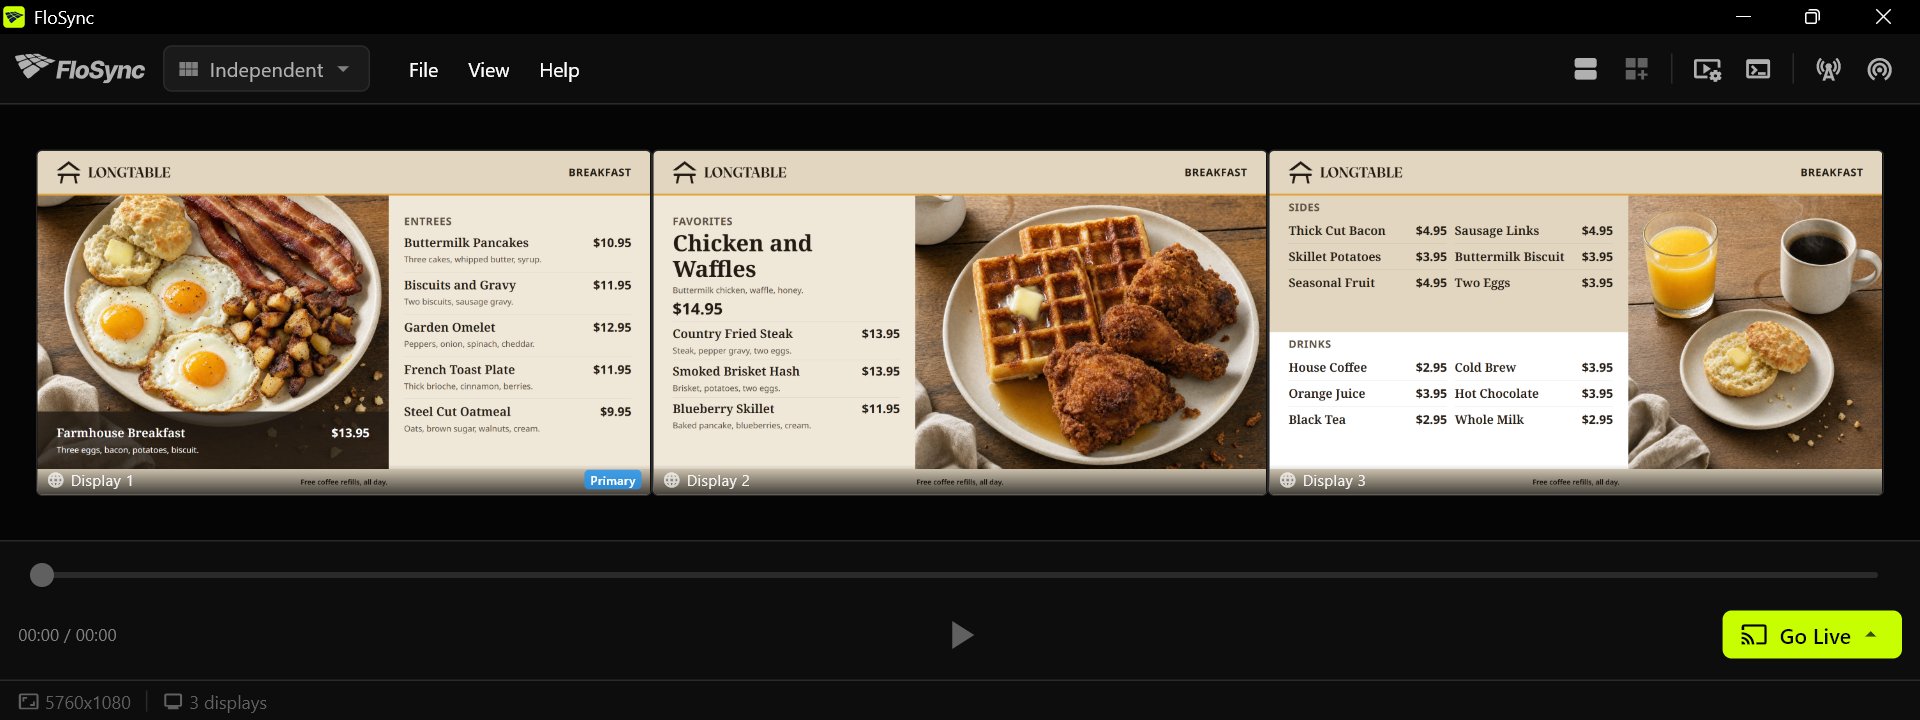 Each box shows the page as it will look on that screen.
Step 6: Open the schedule panel
Click the schedule icon in the toolbar.
The schedule icon, on the right side of the toolbar.
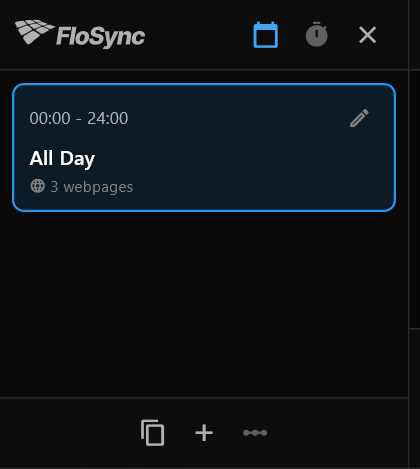 The panel as it opens: one scene, All Day, already holding your breakfast pages.
FloSync's schedule works in scenes: each scene holds a set of content for your screens and the part of the day it shows. A fresh install is in Time-of-Day mode, which is what a menu board wants. If the timer icon at the top of the panel is highlighted instead, click the calendar icon beside it to switch to Time-of-Day.
Step 7: Add two scenes
Click the + button (its tooltip says Add Scene) at the bottom of the schedule panel, twice.
The add scene icon, in the row of icons along the bottom of the panel.
A fresh schedule has one scene, All Day. Two clicks give you three scenes of equal length, ready to name. Add both before setting any hours: adding a scene divides the day evenly again.
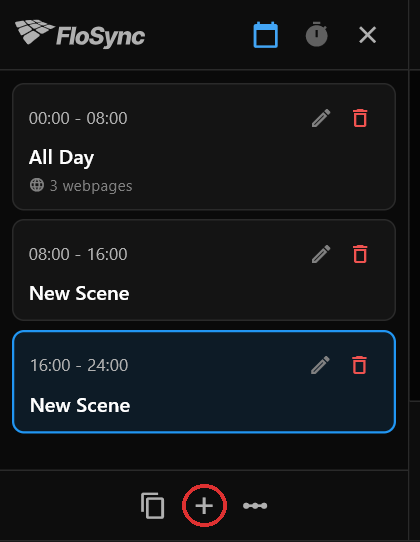 Your breakfast pages stay with the first scene; the two new scenes are empty until you load lunch and dinner.
The screen boxes go blank at this point, because the newest scene is selected and it has nothing in it yet. Your breakfast menu is still there, in the first scene.
Step 8: Name the scenes Breakfast, Lunch and Dinner
Click the pencil icon on each scene, change its Name to Breakfast, Lunch and Dinner in order, and click Save each time.
The edit icon, on the right of each scene card.
Only the name needs changing here. The Start and End fields in the same dialog are for typing an exact time; the next step sets the hours a quicker way.
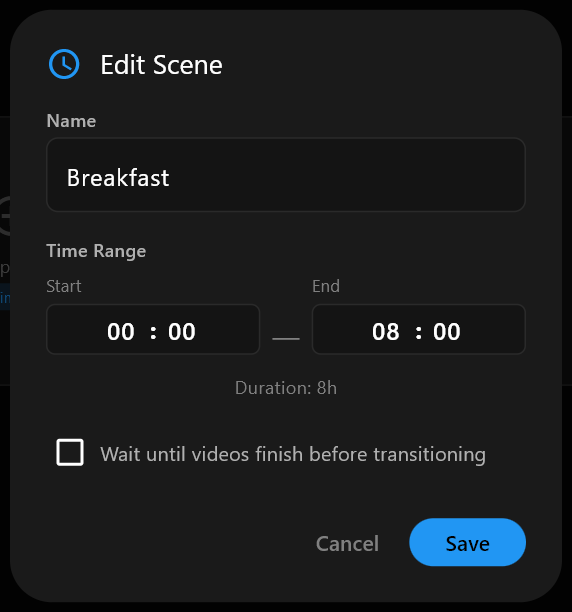 The Edit Scene dialog.
Step 9: Set your changeover times
Edit Timeline shows the whole day as one strip, with each scene as a colored bar. Each handle between two bars sets their changeover time.
Click Edit Timeline, drag the handle between Breakfast and Lunch to 11am and the handle between Lunch and Dinner to 5pm, then click Save.
The Edit Timeline icon, just right of the add scene icon.
The hours under the strip update as you drag. This guide uses 11am and 5pm; use whatever hours your kitchen changes over. The day now reads:
- Breakfast: midnight to 11am
- Lunch: 11am to 5pm
- Dinner: 5pm to midnight
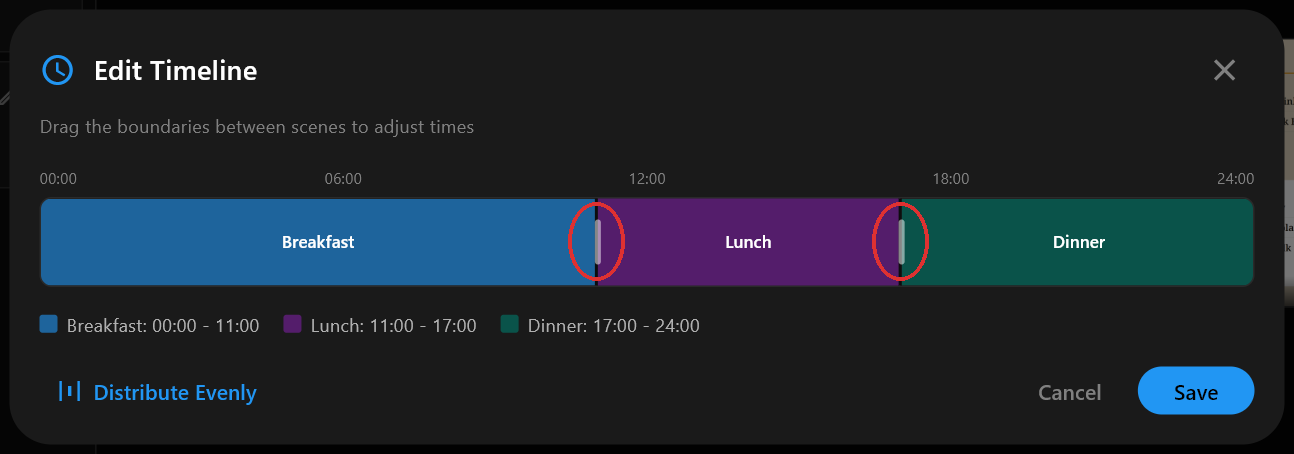 The handles set to 11am and 5pm.
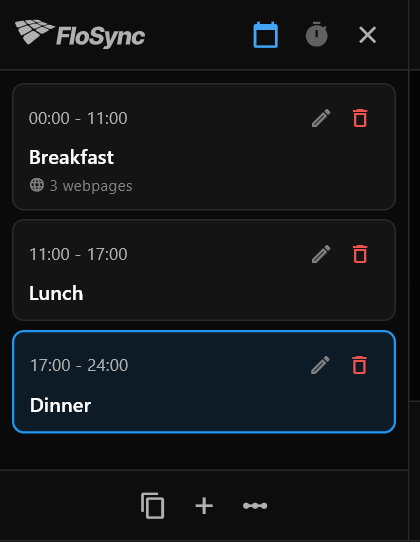 Back in the panel after Save: Lunch starts at 11am, Dinner at 5pm.
Step 10: Load the lunch and dinner menus
Select the Lunch scene and load the three pages from the lunch folder the same way as in Step 5, then select Dinner and do the same with the dinner folder.
Each scene keeps its own content, so clicking between scenes in the panel is enough to check your work as you go.
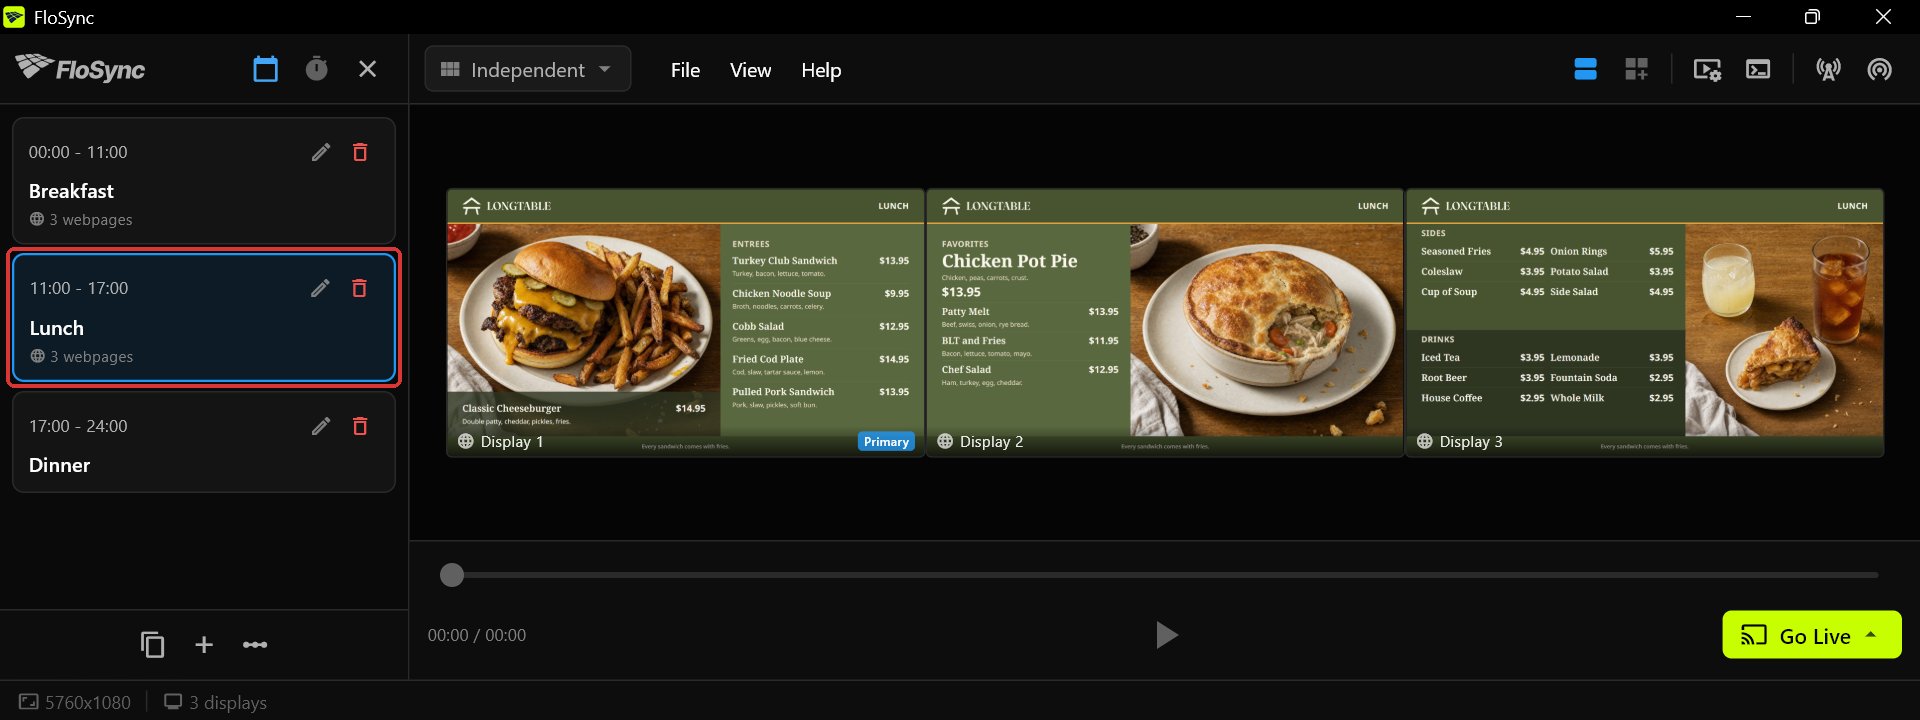 The Lunch scene, 11am to 5pm.
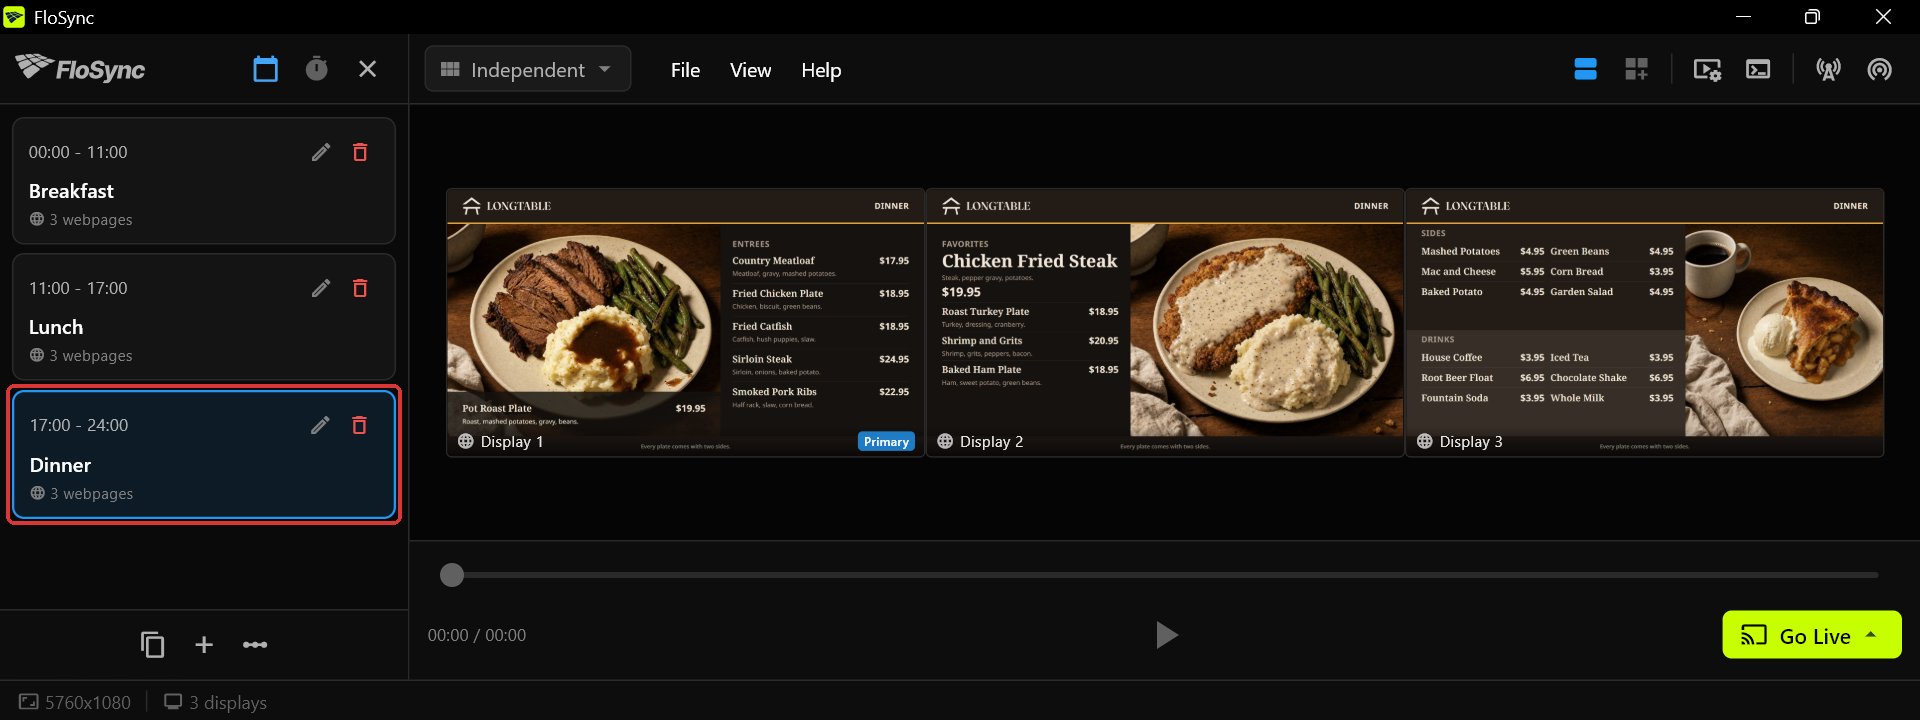 The Dinner scene, 5pm to midnight.
Step 11: Preview the menus and test a changeover
Click Breakfast, Lunch and Dinner in turn to preview each menu, move the next changeover to a few minutes from now, then click Go Live and choose Go Live (Schedule).
Selecting a scene shows its panels in the composer, so you can confirm the right pages are on the right screens before going live. To watch a changeover without waiting for the clock, click the pencil on the scene that's showing now and type an End time a few minutes ahead. If Dinner is the current scene, do that on Lunch instead, which brings Lunch back for a few minutes before Dinner returns.
The Go Live button, at the bottom right of the composer window.
Go Live (Schedule) plays your scenes fullscreen on the real screens. Watch the board change over, then press ESC to return to the composer, and put the changeover back to your real hours.
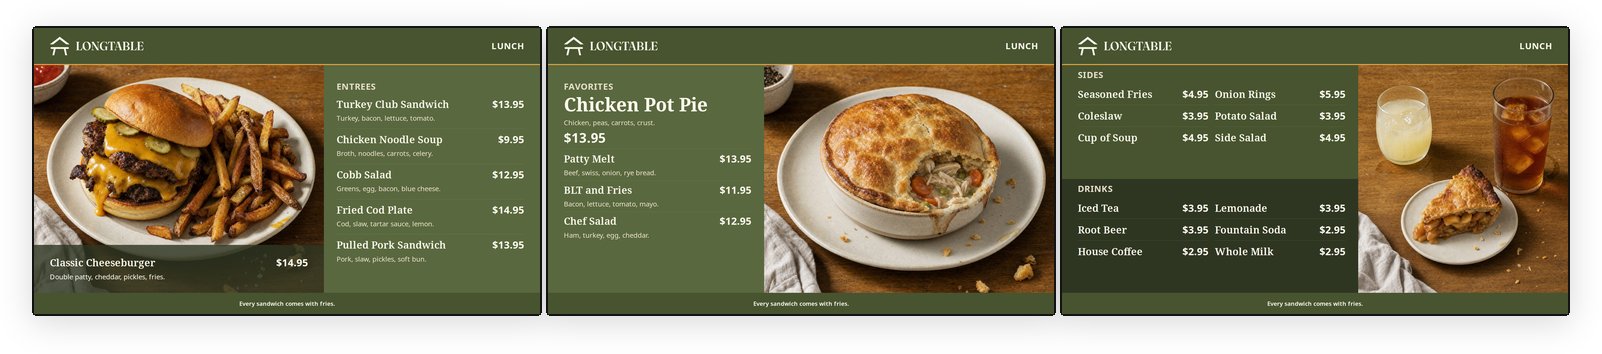 11am: the board has moved on to lunch.
Step 12: Go Live for the day
With your real hours back in place, click Go Live and choose Go Live (Schedule) again.
From here the schedule decides which menu is on the screens.
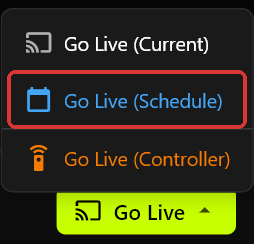 The Go Live menu: Go Live (Schedule) is the one that follows your hours.
Step 13: Start the menu board automatically
Open Preferences, go to the Startup section, turn on Launch FloSync at login, and set Auto Go Live to Fullscreen.
With both set, FloSync opens as soon as someone signs in to the computer and goes live into the schedule after a short countdown, with no one needing to touch the app. For a board that also comes back after a power cut, set the computer itself to power on and sign in automatically; FloSync can't turn on a computer that is off.
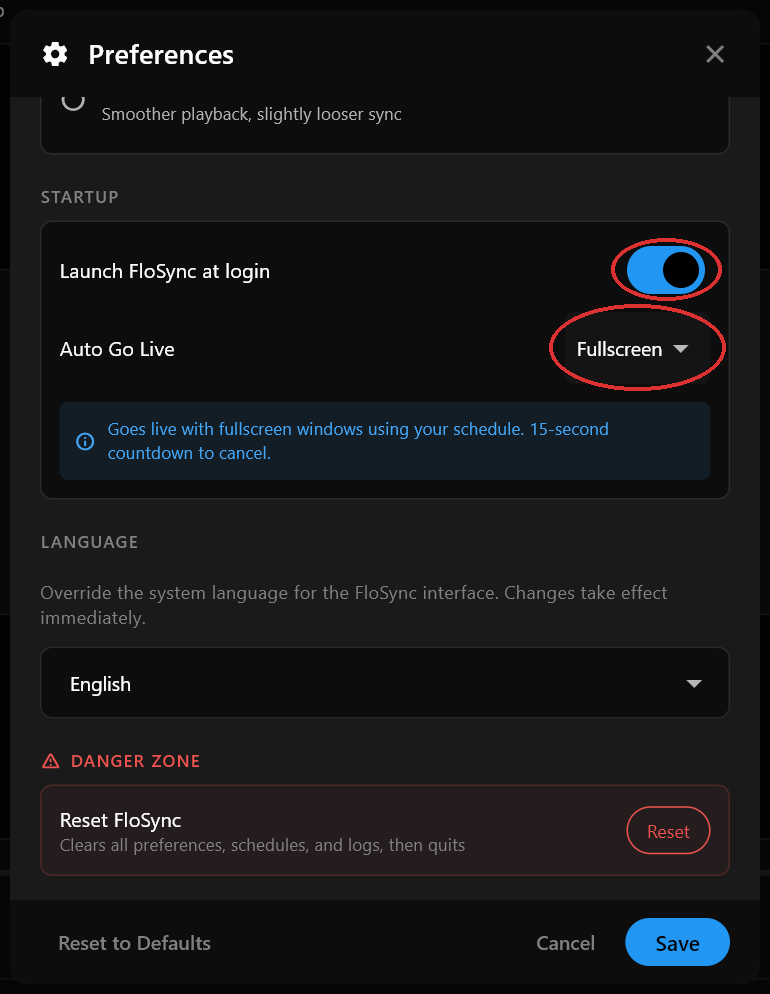 Launch FloSync at login is on, and Auto Go Live is set to Fullscreen.
Wrapping up
Your menu board now follows the schedule by itself. When your hours change, open Edit Timeline and drag the handles again.
Frequently asked questions
Can I use my own menu design instead of the Harvest Table templates?
Yes. Each screen loads its own image, video or web page, so you can use your own design on one screen or on all three.
What happens after a power cut or a reboot?
With Launch FloSync at login turned on and Auto Go Live set to Fullscreen, the board returns when someone signs in after a reboot. To recover without help after a power cut, set the computer to turn on and sign in automatically. FloSync cannot turn on a computer that is powered off.
Can I edit the menu text?
Yes. The templates also come as PowerPoint, Illustrator and Canva files, so you can change dishes, prices, colors and fonts in the program you already use, then save each screen as an image and load it in FloSync. The HTML version used in this guide can be edited too. Copy the file first as a backup, open it in a text editor, search for the dish name as it appears on the board and change it.
Do I need an internet connection for the menu board to run?
No. Download and unzip the template set, keep each HTML file together with its images and fonts folders, and load it as a local file. FloSync reads it straight off your computer, so the board keeps running through an outage.
About the author

Daniel Palka
Creator of FloSync
Daniel has been building multi-screen video software since 2007, when FloSync began as a student project called ArraySync.
Our StoryRelated articles
-
Why Digital Signage Should Run for Weeks, Not Hours
Most signage software is judged on a two-minute demo. What matters is whether it is still right on Thursday, after four days nobody was watching.